Wednesday, February 23, 2011
How cool is THIS??
I found this ancient cookbook at the back of my Hoosier cabinet, and NEITHER of us have the faintest notion where it came from. It's all handwritten, with recipes from a number of different women--each one wrote her recipe on a piece of paper, signed it, and then someone bound them all together with yarn ties. I don't recognize any of the names, either from my home town or my adopted home.
I'm guessing it must have been a church group or women's club, and looks like from the 1920s or 1930s. All the recipes are in pencil or fountain pen...and some look GOOD.
Stand by, we'll be trying a few of them and sharing them with you...a taste of history...
Friday, February 4, 2011
Whole wheat/white bread...smells WONDERFUL on a cold snowy day...
So once again I couldn't find my old bread recipe, and decided to combine whatever sounded good from a variety of other sources. It rose beautifully, both in the bowl and in the pans, and continued to rise as it baked--gorgeous!
1 T. active dry yeast (we got bulk, which is less expensive than in the packets.)
1 T. brown sugar (we use raw, organic sugar that just happens to be brownish
sprinkled over and stirred gently--
1/4 C. warm water--let this set for a couple of minutes and add
1 beaten egg
1/4 cup melted butter
Yes, we're getting into naughty territory, here...
Add 1 1/2 t. salt (sea salt is nice...)
And 1/4 to 1/2 C. honey (I got tired of squeezing the bear somewhere between those...)
Mix those into the yeast/egg/butter mixture.
One recipe called for 4 C. whole wheat and 4 C. white flour, but I was short of whole wheat, so I added a half cup of wheat germ, 2 C whole wheat and 6 of organic white.
Whatever, stir them into the liquid mixture and then turn out on a floured board and knead this it sticks together reasonably well.
Let it rise in a BIG bowl till you're afraid it's going to run over, punch down and knead again. It'll feel a lot silkier now...
(It's winter, we don't have a wood fire going, so warm places are a bit short. I half submerged the bowl in the sink in warm water, which I refreshed twice during the rising. You could probably use a heating pad too...)
Divide in two, form into loaves, and put these in buttered loaf pans. I made decorative cuts in the top of the loaves, rubbed butter on top, and let them rise again--then baked at 350 for 45 minutes.
Oh, my. VERY, VERY good.
(I made an organic baby romaine, yellow bell pepper, and fresh mushroom salad, with Joseph's gorgonzola dressing, J. made his herb-encrusted roast from one I got him at Christmas at Whole Foods, and we mopped up the herbs and juices with bits of bread. Doesn't get any better than that...)
So, before I forget, here's the current recipe!
1 T. active dry yeast (we got bulk, which is less expensive than in the packets.)
1 T. brown sugar (we use raw, organic sugar that just happens to be brownish
sprinkled over and stirred gently--
1/4 C. warm water--let this set for a couple of minutes and add
1 beaten egg
1/4 cup melted butter
Yes, we're getting into naughty territory, here...
Add 1 1/2 t. salt (sea salt is nice...)
And 1/4 to 1/2 C. honey (I got tired of squeezing the bear somewhere between those...)
Mix those into the yeast/egg/butter mixture.
One recipe called for 4 C. whole wheat and 4 C. white flour, but I was short of whole wheat, so I added a half cup of wheat germ, 2 C whole wheat and 6 of organic white.
Whatever, stir them into the liquid mixture and then turn out on a floured board and knead this it sticks together reasonably well.
Let it rise in a BIG bowl till you're afraid it's going to run over, punch down and knead again. It'll feel a lot silkier now...
(It's winter, we don't have a wood fire going, so warm places are a bit short. I half submerged the bowl in the sink in warm water, which I refreshed twice during the rising. You could probably use a heating pad too...)
Divide in two, form into loaves, and put these in buttered loaf pans. I made decorative cuts in the top of the loaves, rubbed butter on top, and let them rise again--then baked at 350 for 45 minutes.
Oh, my. VERY, VERY good.
Here's what it looked like, done--made two BIG loaves... |
(I made an organic baby romaine, yellow bell pepper, and fresh mushroom salad, with Joseph's gorgonzola dressing, J. made his herb-encrusted roast from one I got him at Christmas at Whole Foods, and we mopped up the herbs and juices with bits of bread. Doesn't get any better than that...)
This is artisan bread, also very good, but you have to keep a starter in the fridge for it...I ran out of room and time! |
Thursday, December 9, 2010
Maple Sausage Stuffed Acorn Squash!
Joseph made dinner again tonight, and lo, it was GOOD. Just right for a gray wintry day...
Maple Sausage Stuffed Acorn Squash
1 acorn squash (we got ours from our organic CSA--that's Community Supported Agriculture)
3/4 lb natural (nitrate/nitrite-free) pork sausage (Turkey sausage is for weenies.)
4 tsp Demerara cane sugar (I use Florida Crystals Natural.)
1/4 c real maple syrup (Do not use the fake stuff or you will die.) [Note from Kate: Don't believe him, J. tends to get passionate about cooking. You won't DIE, you'll just...ok, maybe you will...]
Preheat oven to 350.
Cut squash in half, remove pith & seeds and bake face down in a pan of water for about an hour – squash should be tender.
Fry up sausage so it’s crumbly - no big chunks.
Drain sausage, add maple syrup and mix well. Set aside until squash is done.
When squash is done, remove from pan and discard the water. Return squash to pan face up. Sprinkle 1 tsp sugar in the hollow of each squash, spoon in one half of the sausage & maple mixture and sprinkle another tsp of sugar over the top of each.
(Note: I like hot sausage and Kate likes mild so I added about 1 tsp of crushed red pepper to my half of the mixture.) [I also added a wee bit of sea salt to mine...I love sweet/salty...]
Return to the oven and bake for another 20 minutes.
Serves two.
---------
Or four, if you have a salad or other vegetable with it...I'm SO FULL!
Sunday, November 21, 2010
TRADITION!!
American Thanksgiving...and
Grandma's Green Beans
(sort of...)
We all have special family traditions, especially at holiday times. (Although I loved my grandmother's green beans any time, any place!) This is a recipe that's familiar to most of us, in one form or another, a Green Bean Casserole. (Believe it or not, we saw it pre-packaged at the discount store the other day. That's just WEIRD.)
Normally, it looks pretty much like this, though I'll admit I've jazzed it up a bit--made it a little more grown up and somewhat healthier than the version I grew up with. (Still can't do without those French's Onions, though...)
Instead of regular canned green beans, consider preparing fresh ahead of time, cooking them till tender by steaming or (gasp!) boiling. We get organic ones from our CSA (Community Supported Agriculture), which delivers fresh vegetables and fruit (and sometimes meat) to our door. I've also used canned organic beans, and that works just fine, too!
You'll need about 4 cups of beans to make enough to share with the family...
Give this a try!
4 C. or two cans of green beans, preferably organic
1 large can of cream of mushroom or cream of celery soup--regular, fat free, or "Healthy Request" if you like (*or make your own, it's not hard! See the recipe below...)
1 small can of organic mushrooms OR 1 C. of raw mushrooms, saute'ed in butter or canola oil or a mix.
1 1/2 C. grated sharp cheddar cheese--if you've got access to organic cheese, great. (Or grate...)
1 T. fresh garlic, minced (the jarred stuff will do, of course)
A splash of white wine--like 1/4 to 1/2 cup. Dry-ish wine is probably best, but I've used Rhine with no complaints...
A squeeze of fresh lemon juice. Trust me, you'll like it...
Dash of sea salt, if you wish...
And yes, all right, one small can of French's Onions. Yum. Don't eat too many out of the can...
Mix the green beans, cheese, and soup together in a large bowl...
A handful of the onions are good in the mixture, too! (OK, 2/3 cup, if you like measurements...) Add the garlic, wine, lemon juice, and salt and stir.
Pour into a large, greased flat pan. Bake at 350 degrees for a half hour, sprinkle on more onions (YES, more) and bake for 5 more minutes or till the onions are golden brown.
Two of my godchildren request this every Thanksgiving, and it's all gone by the end of the meal!
(And yes, you're right, that illustration didn't actually go with this recipe, I forgot!)
* Homemade cream of mushroom soup
1 lb. fresh mushrooms, chopped
1/4 C. butter or butter and oil mixture, not margarine. (Have you read the ingredients on margarine?? I don't THINK so. )
1 sweet onion, finely chopped
2 cloves of garlic, minced
2 T. flour (we get organic white/whole wheat flour)
4 C. broth (chicken, vegetable, whatever. Swanson's makes a quite good organic chicken broth!)
1 C. cream or half and half
salt and pepper to taste.
Saute mushrooms, onions, and garlic in butter till tender, add the flour and stir over medium heat for about a minute. Remove from heat and add the broth, return to heat, bring to a boil, then lower the heat and continue to stir for about 2 minutes. Add the cream, whisk, but don't let it boil again. Voila, cream of mushroom soup!
(If you use celery chopped fine, then of course this is cream of celery soup!)
Thursday, November 18, 2010
Kielbasa and Kraut Medley
Another oldie but goodie...
KIELBASA & KRAUT MEDLEY
Joseph fixed dinner last night, while I curled up by the chiminea he got for me, reading a new Kelly Armstrong book by a warm, crackling fire...is life good, or what?! He chatted with an old friend on the phone as he cooked, then when he brought the plates out by the fire, told me he'd taken photos, just as I've been doing for the new shared food blog.
Hooray! I said "then you can write it up for Starving Artists?"--and lo, he did, and you'll find it below! This is one of my favorite cool-weather dinners, hearty and somewhat German in flavor, savory with meat and onions and fruit...YUM.
Somehow, eaten by the fire on a lovely November evening, cooked by my love, it tasted even better than I remembered!
Kielbasa & Kraut Medley
4 6-8” kielbasa (about 2 lbs)
2 C sauerkraut
4 small apples (Jonathans are good), cored and sliced
1 large onion, quartered and sliced
Olive oil, coconut oil, or bacon grease.
Brown the kielbasa well in a little bit of oil or grease. Remove from pan, add onion and cook until glazed. Add apples and cook until slightly browned. If you’re drinking beer or hard cider while cooking, you can add a little of that. Add kielbasa and kraut. Stir up well, cover and simmer for about 15 minutes. Serves six--or makes wonderful leftovers!
------------------
(Of course I have to nib in and add my thoughts on this...)
You can use turkey kielbasa (or smoked sausage) if you're watching your fat intake--tastes great anyway--and tart apples are definitely marvelous in it. (This isn't the place for sweet, bland, mealy apples that fall apart when cooked! You want that tart-sweet flavor. We like to buy local Jonathans, as mentions, organically grown if possible.)
I like sweet Bavarian sauerkraut in this, the kind with caraway seeds, if I haven't made my own--and that I haven't done in a lot of years! The above illustration was painted 30 years ago, from a batch of my own home-canned Bavarian-style stuff--it still hangs in my kitchen today, a lovely reminder of those years. (It's gouache and sepia ink on a warm tan matboard background.)
Making sauerkraut is dead easy, as far as the process goes, but it can be a tad tricky. The right temperature range and careful cleanliness are needed to insure proper fermentation.
When my late husband and I lived on our little back-to-the-land farm and I canned mountains of stuff from our own organic garden, I made some of the best and worst I've ever tasted--and one memorable batch that was in the root cellar when it flooded, and came out smelling of kerosene from the lantern that decided to float. Needless to say, that batch didn't get tasted--it didn't even make compost! Ewwwww...
According to The Joy of Cooking--still my favorite cookbook!--sauerkraut's healthful qualities were recognized as early as 200 B.C. when workers on got a daily ration as they worked on the Great Wall of China. It appears it was first mentioned in America in 1776, and as expected, it was primarily eaten in German communities. (Sauerkraut literally means "sour cabbage," in German.)
I couldn't find my old recipe--it was NOT in The Joy--but this site comes close: http://www.kitchenproject.com/kpboard/recipes/HOMEADESAUERKRAUT.htm
Remember, sauerkraut gets milder with cooking--in the wonderful dish above, it just adds a lovely tang. If you think you hate sauerkraut, you may find differently when you try this recipe!
We hope you enjoy this hearty dish as much as we did--great with hard cider or a rich lager like Sam Adams, too...
KIELBASA & KRAUT MEDLEY
Hooray! I said "then you can write it up for Starving Artists?"--and lo, he did, and you'll find it below! This is one of my favorite cool-weather dinners, hearty and somewhat German in flavor, savory with meat and onions and fruit...YUM.
Somehow, eaten by the fire on a lovely November evening, cooked by my love, it tasted even better than I remembered!
Kielbasa & Kraut Medley
4 6-8” kielbasa (about 2 lbs)
2 C sauerkraut
4 small apples (Jonathans are good), cored and sliced
1 large onion, quartered and sliced
Olive oil, coconut oil, or bacon grease.
Brown the kielbasa well in a little bit of oil or grease. Remove from pan, add onion and cook until glazed. Add apples and cook until slightly browned. If you’re drinking beer or hard cider while cooking, you can add a little of that. Add kielbasa and kraut. Stir up well, cover and simmer for about 15 minutes. Serves six--or makes wonderful leftovers!
------------------
(Of course I have to nib in and add my thoughts on this...)
You can use turkey kielbasa (or smoked sausage) if you're watching your fat intake--tastes great anyway--and tart apples are definitely marvelous in it. (This isn't the place for sweet, bland, mealy apples that fall apart when cooked! You want that tart-sweet flavor. We like to buy local Jonathans, as
I like sweet Bavarian sauerkraut in this, the kind with caraway seeds, if I haven't made my own--and that I haven't done in a lot of years! The above illustration was painted 30 years ago, from a batch of my own home-canned Bavarian-style stuff--it still hangs in my kitchen today, a lovely reminder of those years. (It's gouache and sepia ink on a warm tan matboard background.)
Making sauerkraut is dead easy, as far as the process goes, but it can be a tad tricky. The right temperature range and careful cleanliness are needed to insure proper fermentation.
When my late husband and I lived on our little back-to-the-land farm and I canned mountains of stuff from our own organic garden, I made some of the best and worst I've ever tasted--and one memorable batch that was in the root cellar when it flooded, and came out smelling of kerosene from the lantern that decided to float. Needless to say, that batch didn't get tasted--it didn't even make compost! Ewwwww...
According to The Joy of Cooking--still my favorite cookbook!--sauerkraut's healthful qualities were recognized as early as 200 B.C. when workers on got a daily ration as they worked on the Great Wall of China. It appears it was first mentioned in America in 1776, and as expected, it was primarily eaten in German communities. (Sauerkraut literally means "sour cabbage," in German.)
I couldn't find my old recipe--it was NOT in The Joy--but this site comes close: http://www.kitchenproject.com/kpboard/recipes/HOMEADESAUERKRAUT.htm
Remember, sauerkraut gets milder with cooking--in the wonderful dish above, it just adds a lovely tang. If you think you hate sauerkraut, you may find differently when you try this recipe!
We hope you enjoy this hearty dish as much as we did--great with hard cider or a rich lager like Sam Adams, too...
Tuesday, November 9, 2010
Oooh, nooooooo....
We got a catalog from King Arthur Flour yesterday--their baker's catalog holiday edition. EVIL!!!
I am pretty careful about using organic flour and other ingredients, so not interested in the mixes and all--but oh, all those wonderful TOOLS. Bread bowls. Mixers. Tart pans, Springerle rollers. Silicone rolling pins. Giant spatulas...
I'm in love!
I am pretty careful about using organic flour and other ingredients, so not interested in the mixes and all--but oh, all those wonderful TOOLS. Bread bowls. Mixers. Tart pans, Springerle rollers. Silicone rolling pins. Giant spatulas...
I'm in love!
Saturday, November 6, 2010
Garlic Mashed Cauliflower
Another oldie but goodie...
Garlic Mashed Cauliflower
If you’re watching your carbs, give this a try instead of potatoes!
cauliflower, originally uploaded by Cathy (Kate) Johnson.
My good old masher! (One of several--I like antique kitchen tools...)
Add at least a tablespoon of minced garlic (lots more if you're garlic nuts!), sea salt*, fresh ground pepper and a tablespoon full or two of butter. Yes, real butter--organic if you can find it!
We use about 3/4 to a cup of cheese, sometimes freshly grated reduced-fat (part skim, that is) sharp cheddar, sometimes a bag of pre-shredded Italian cheeses with herbs, if we catch them on sale. You can skip the cheese altogether, of course, or add a non-dairy substitute if necessary--I hear they melt better now. Mix that in while the cauliflower is still hot, and if you like, return it to the burner to continue melting the cheese.
Note: Ooops, I forgot to mention that this is also quite good WITHOUT cheese, for those who are watching their fat intake closely...I edited the entry!
For a really delicious treat–if you can wait that long!–plop it in a greased casserole dish, then tuck it into the oven set at 325 degrees till it’s brown on top.
Oh. My. You won’t miss potatoes...and your family will be requesting this for special occasions, mine does!
Notes:
☛ We’ve switched from regular salt to sea salt, for health reasons, and use a fraction of what we used to--I still love it, but J. needs to watch his blood pressure. If you want to give sea salt a try, good old McCormick http://mccormick.com/ makes a sea salt grinder you can buy in the grocery store–or even from Amazon! You can’t refill it, though.
Roland Sea Salt is romantic as the dickens...”collected from the warm waters of the Mediterranean,” tra la. (I couldn’t taste the Italian flavor in the cauliflower, though!) You can read more about the company, which advertises that they bring the world to you, at http://rolandfood.com. Use this crystalline stuff in the coarse form in dishes where it will dissolve on its own, like soups or stews, or grind it fresh, for best flavor...
If you can't find it in your local grocery store, you can find IT on Amazon, too...
Roland Sea Salt Coarse Crystals from the Mediterranean Sea - 26.4 oz
And a good grinder’s a necessity, if you use this type of sea salt! I found a couple of likely ones on Amazon–isn’t it amazing what you can find there now? Not just books any more! This one looks like a pretty decent one: Kyocera Ceramic Fine Mill, White Top
J. found an old pepper mill at a thrift store that worked just fine, like my masher, though, so look around...shopping in antiques malls and thrift stores is a great way to find tools that do exactly what you need, without the bells and whistles--which means without the noise or the electrical use, either.
---------
Let us know what you think of this, if you try it! We love feedback
And by the way, I used the Uni-ball Signo white gel pen and inexpensive Pelikan gouache for the cauliflower--it's on Canson Mi-Tientes paper.
Subscribe to:
Posts (Atom)
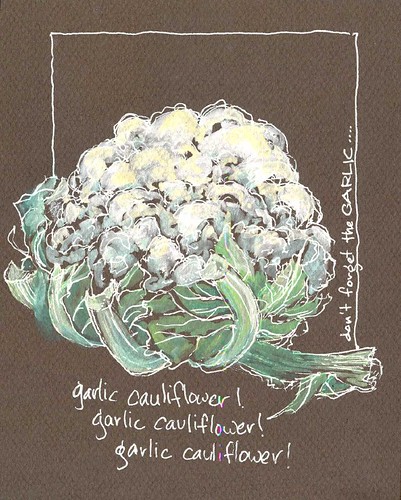
Yes, I know this is normally garlic mashed potatoes...but for those who are trying to cut down on carbs and also up your intake of cole-family vegetables, this is LUSCIOUS! Looks pretty much like the old standby, too...
We get a fresh head of cauliflower and cut it up into small florets–what you don’t eat raw, that is. (I can’t keep my hands off of it--you may hear me crunching away right now--but there’s always plenty left...) Steam until tender with just a bit of water, then drain off the excess liquid. (Yes, of course you save that for soup stock!)
Mash with a potato masher–we’ve got the old-fashioned hand-operated kind, but you can use an electric mixer or food processor, if you prefer. I just like quiet in the kitchen!